Thursday, 27 February 2025

Yeasted Loaf

Finished loaf

Ingredients

  • 500g strong white bread flour, plus a little extra for dusting
  • 7g salt (about one teaspoon)
  • 5g instant dried yeast (about one teaspoon)
  • 350g warm water (around 30 degrees Celsius)

Utensils

  • large mixing bowl
  • scales
  • oven
  • baking tray or baking stone
  • clean tea towel
  • sharp knife
  • small ovenproof tray or dish enough to hold half a cup of water (optional)
  • a board or baking tray without a lip on it to act as a peel (optional)
  • dough scraper (optional)
  • sturdy spoon (optional - you can just use your hands)

Method

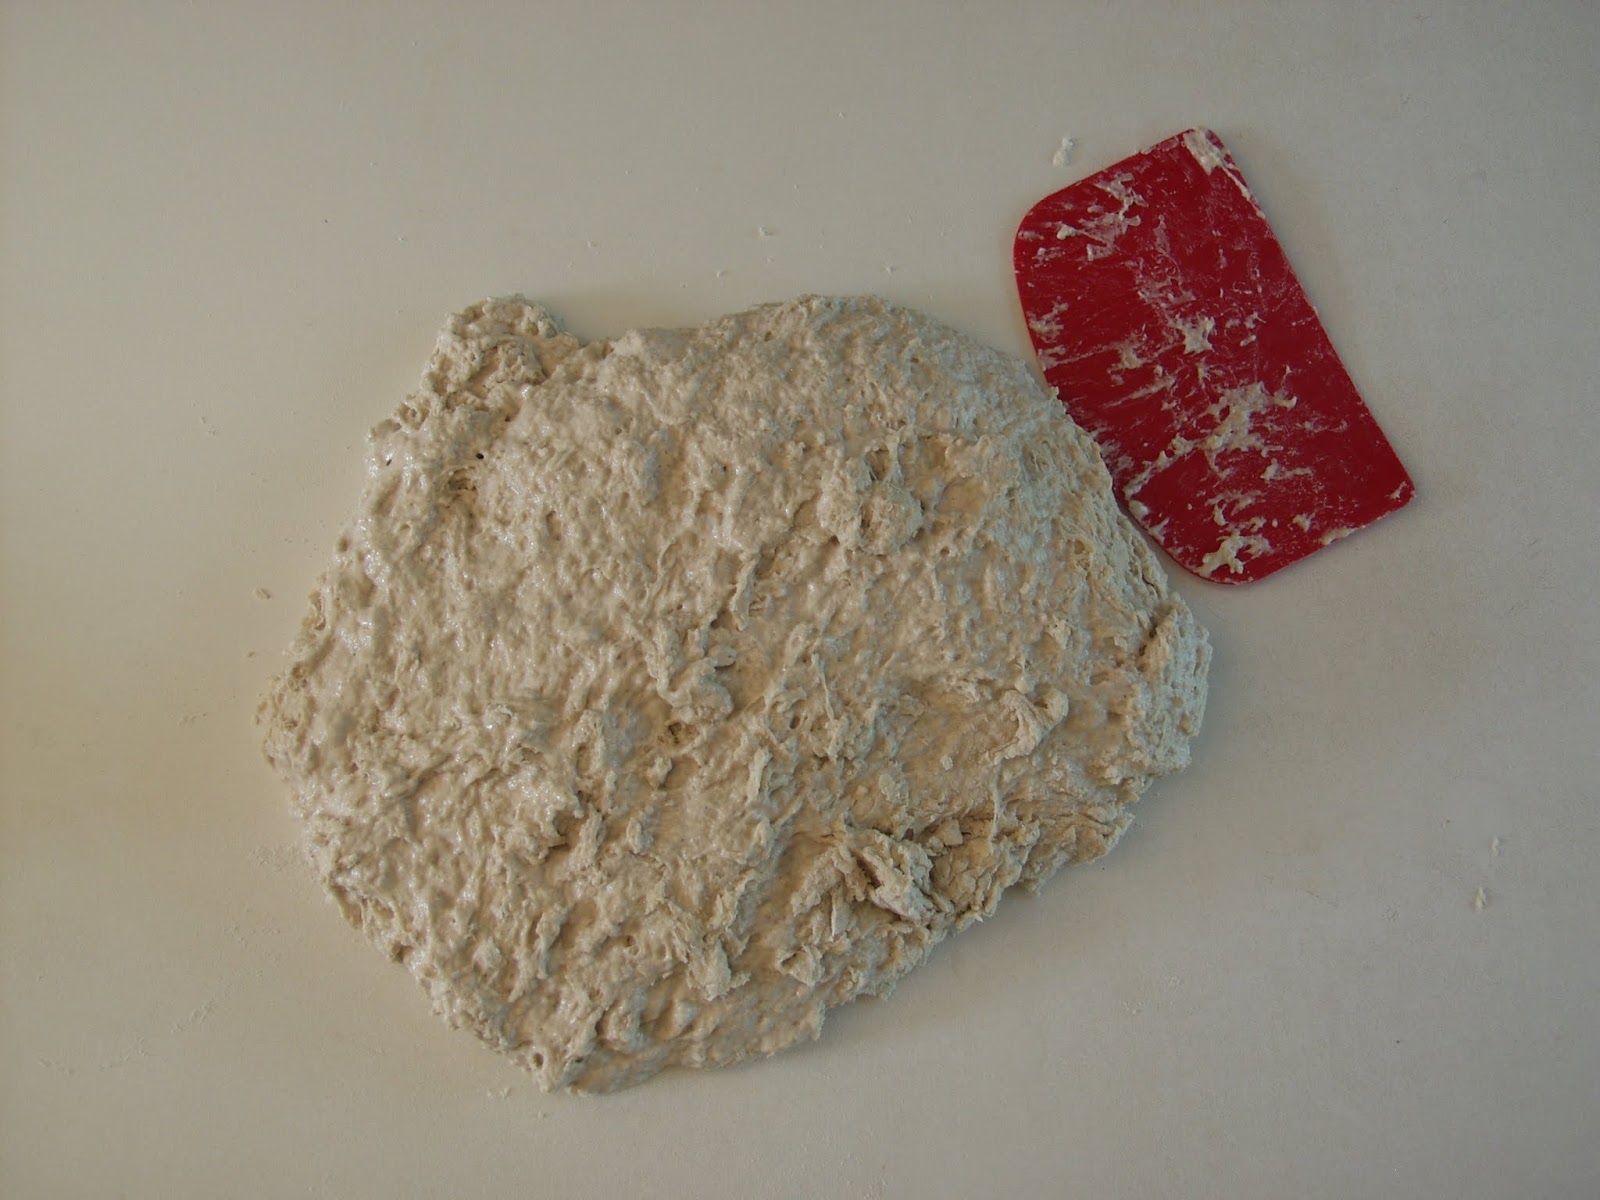
  1. Add all the ingredients to the bowl and bring them together with your dough-scraper or a sturdy spoon. You should end up with a shaggy sticky mess that's kind of evenly combined.
  2. Knead the dough, it will be a big sticky mess DO NOT ADD ANY FLOUR, the key to getting a light bread is to use a wet dough, adding flour will make it denser. The technique for kneading it requires some practice but it's quite fun, if messy. There's a bit too much to go into here but this is a link to a video explaining it in some detail.
  3. Once you've kneaded the dough form it in your to a ball, lightly flour your mixing bowl, put the dough back in it and cover it with a damp tea towel, a plate or some cling-film.
  4. Place the covered bowl in a warm place (around 25 degrees celsius) and leave it for an hour.
  5. The dough should have risen appreciably, anywhere up to doubling in volume. Now we're going to fold the dough, a kind of miniature knead that helps give it structure and evens out the temperature etc. Rather that try to explain it, here's a video showing how it's done.
  6. Return your dough to your covered bowl and put it back in a warm place for another hour.
  7. Your dough should have about doubled from it's original volume by the time you return to it. Now we're going to shape it into a loaf shape called a batard, here's another video showing you how.
  8. Once it's shaped, flour your clean tea-towel, place your loaf seam-side down on it and gently wrap it in the towel to stop it drying out. Leave your loaf in a warm spot to prove.
  9. Put your oven on to preheat at 220 degrees celsius.  If you have a baking or pizza stone put that in the oven to heat up.
  10. Wait for 30 minutes, check your loaf, it should have grown noticeably but not as much as doubling in size.
  11. (Optional - if you're precious about your oven you can skip this step) Boil a cupful of water in your kettle, pour it into your small ovenproof dish and put it in the bottom of the oven. This will keep your oven humid and make for a lighter, prettier loaf by allowing it to expand more before forming a crust.
  12. If you're feeling confident and have a baking stone in the oven:
    • flour a clean board or tray without a lip on it, this is going to be your baking peel
    • place your dough on the floured board, seam side down
    • make a shallow cut in the dough along its length about half a centimetre deep and at about 45 degrees to the surface of the dough, you're trying to make a flap which will open as the bread expands in the oven to make it look nice
    • being careful of the hot oven, slide the loaf from your peel onto the hot stone in the oven and close the door
  13. If you're not feeling quite so sure and don't have a hot stone in the oven:
    • place your dough on a cold baking tray, seam side down
    • make a shallow cut in the dough along its length about half a centimetre deep and at about 45 degrees to the surface of the dough, you're trying to make a flap which will open as the bread expands in the oven to make it look nice
    • being careful of the hot oven, place the tray with the loaf on it in the oven and close the door
  14. wait 10 minutes then remove the dish of water from the oven.
  15. Wait another 10-20 minutes
  16. Carefully take the hot loaf (use oven-gloves) out of the oven and tap its bottom. If it sounds hollow and has a nice brown colour then it's done. Otherwise return it to the oven and test again in five minutes.
  17. Place the finished loaf on a wire rack to cool.

Wednesday, 31 July 2024

Pizza


This recipe is adapted from one by Ken Forkish in his book Flour, Water, Salt, Yeast.

Utensils

  • oven
  • cling film
  • large bowl for mixing and letting the dough prove in
  • (optional but recommended) pizza stone
  • (optional but recommended) flat (no lip on the edge) oven tray for delivering the pizza to the hot oven
  • (optional) dough scraper
  • (optional) blender to make a smooth sauce / pesto

Ingredients

For the dough

  • 400g strong white bread flour
  • 1/4 teaspoon instant yeast (other yeasts will do but will acquire adjustments to quantity)
  • 8g salt
  • 280g lukewarm water

For the sauce

  • 400g tin of tomatoes
  • (optional) one tablespoon tomato puree
  • (optional) half an onion
  • (optional) one clove of garlic
  • (optional) herbs of your choice
  • (optional) HP Sauce! / soy source / something to give it some umami
  • salt and pepper to taste

For toppings

  • (optional) mozzarella / other cheese / vegan equivalent
  • (optional) a few thinly sliced vegetables of your choice (peppers, mushrooms, olives...)
  • (optional) nuts / herbs / olive oil for a quick pesto

Method

  • Mix all the ingredients together and knead too a loose sticky dough
  • Form the dough into a ball, place it in a lightly floured covered bowl and leave it to prove in a warm place (around 25 degrees Celsius for 45 minutes)
  • Letter-fold the dough and return it to its proving bowl
  • Leave to prove until doubled in size - around 5 hours!
That gives us some time, so make your sauce / prep your toppings
  • finely dice the onion
  • heat a pan on low and fry the onion till soft
  • add the finely diced / crushed garlic for a minute or two
  • add the remaining ingredients and simmer on low for at least 15 minutes
  • (optional) blend the sauce, it's easier to spread on the pizza 
  • (optional) blend together some nuts, herbs, olive oil and seasoning to make a pesto, e.g. walnuts and parsley
Back to the dough
  • Split the dough into balls around 340g in weight
  • Lightly cover the balls with olive oil and cling film and place in the fridge for a couple of hours to a coupe of days
  • Preheat oven and baking stone to 250 degrees Celsius - will take around an hour
  • Shape
  • Flour a peel / baking tray, place dough on it and quickly cover with sauce and toppings
  • Slide directly onto the hot stone and bake for around 6 minutes
  • Serve


Sunday, 28 July 2024

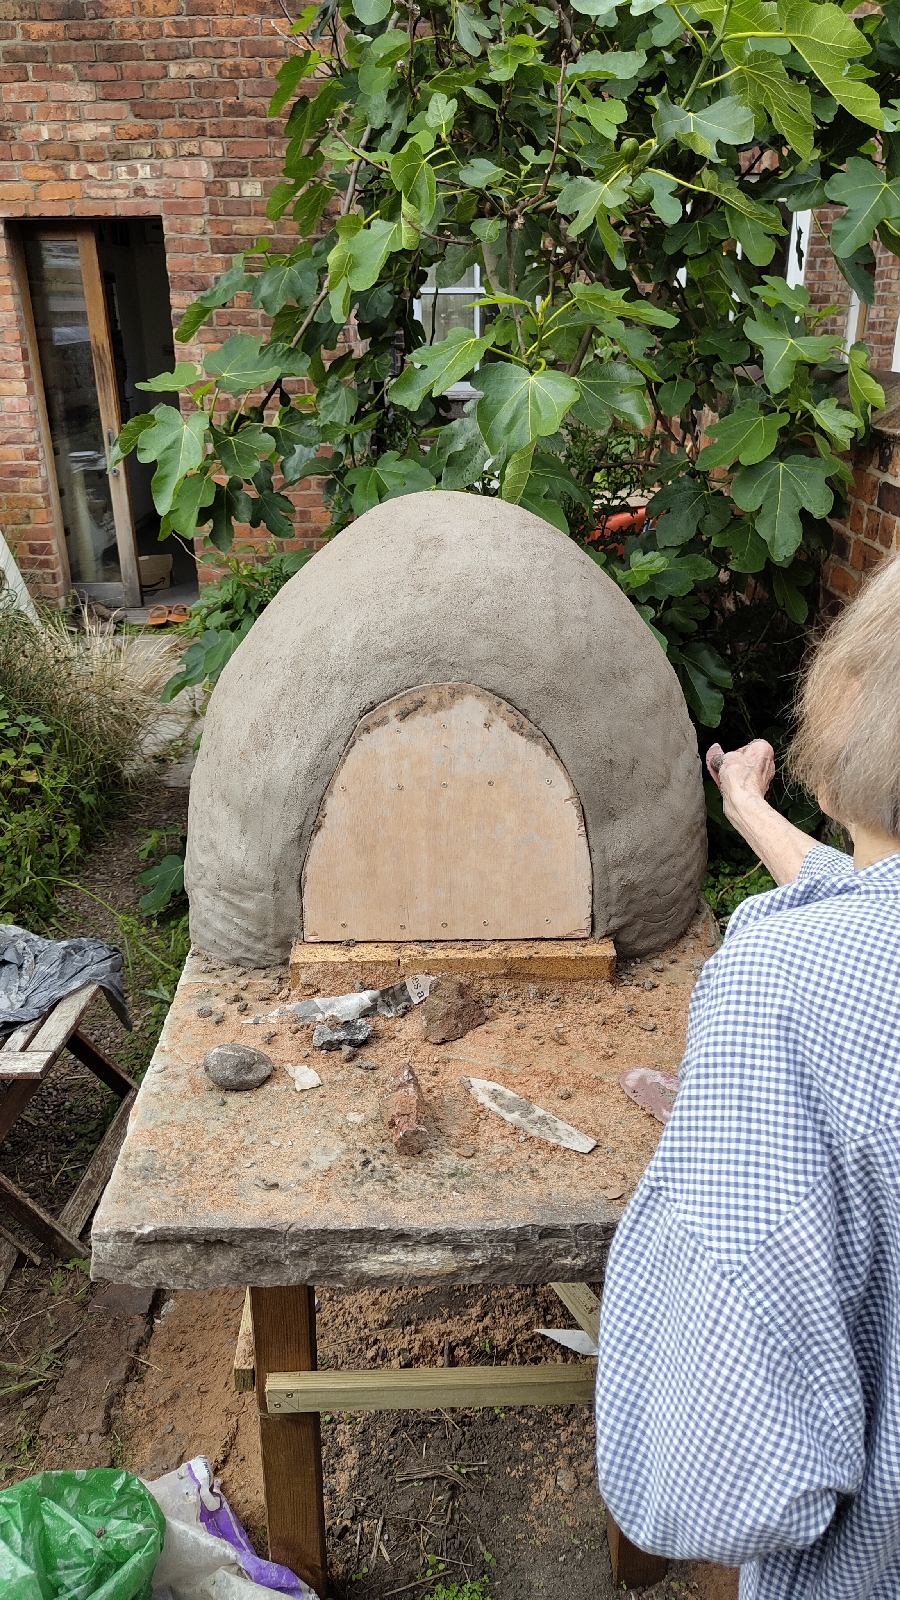
Construction complete

So a long weekend of fairly heavy work got the main structure built, it was tiring but fun. 
Having a retired ceramicist on hand definitely helped 🙂
Treading the clay / sand mix was quite therapeutic.
Marking out the hearth, the ratio of dome height to door height is apparently important for good airflow.
Tamping down the sand-form took a while.
After a few days' drying the sand scraped out pretty easily and nothing collapsed.
A slight crack keeps appearing above the door, I keep patching it, we'll see how it goes.
Made a peel from a frond off the palm tree and a bit of ply.

Friday, 28 June 2024

Mud Oven

It's been on the cards for a while but I've finally made a start on making a mud oven. Might take a while to complete but hopefully will be done over the summer. 

Expenditure so far is as follows: 
  • 18 Firebricks £65.60 (delivered)
  • 2x2.4m fenceposts £26
  • 5x2m treated timber £20
  • 75kg fireclay £70 (delivered) 
  • 1 York stone slab £0 (was lying around the garden) 


Friday, 19 November 2021

Demi-baguettes


 Fitting full-sized baguettes in a domestic oven is tricky, hence these ones will be about half normal size, this recipe makes four.

Ingredients

  • 500g strong white bread flour (plus a little extra for dusting)
  • 10g salt
  • 4g instant dry yeast
  • 350g water

Utensils

  • Oven
  • Scales
  • Baking tray (heavier the better) or pizza stone (around 30cm by 30cm)
  • Spare baking tray / flat board for delivering loaves to the oven
  • Shallow oven-proof dish or tray (only has to hold half a cup of water)
  • Sharp knife (for slicing the loaves)
  • Two clean tea-towels or equivalent for the bread to prove in


Method

Mixing

  1. Mix all the ingredients together in a large bowl
  2. Turn the mixture out onto a clean work surface and knead until it becomes a smooth dough
  3. Form the dough into a ball and return to the lightly floured mixing bowl
  4. Cover and leave in a warm place for an hour
  5. Letter-fold the dough and return to the mixing bowl
  6. Cover and leave in a warm place for another hour

Shaping

  1. Place a baking stone or heavy baking tray in your oven and preheat to 250 degrees Celsius, or as close as you can get
  2. Turn the dough out onto a lightly floured work surface
  3. Divide it into four portions of around 200-220g and loosely shape them into balls
  4. Pat each ball out into a flat oval
  5. Fold the long edge of the oval into the centre and press down firmly
  6. Repeat that for for the other long edge
  7. Fold in half again, crimping the edge well to seal
  8. Gently roll the dough out to form a baguette shape
  9. Transfer the dough to a floured tea towel to prove
  10. Repeat with all portions and cover with another tea towel
  11. Leave to prove for half an hour

Baking

  1. Place half a cup of boiling water into a shallow container in the bottom of the oven
  2. Slice each loaf down the middle with three or four cuts, overlapping by one quarter to a third of their length
  3. Transfer the loaves to the oven
  4. Turn the oven down to 220 degrees Celsius
  5. Bake for five minutes then remove the water
  6. Bake for another 7-10 minutes
  7. Remove from the oven and leave to cool


Wednesday, 12 May 2021

Savarin


Ingredients

    For the batter:

    • Strong white flour 225g
    • Salt 1 teaspoon
    • Dried instant yeast 7g
    • Milk 150g
    • Caster sugar 2 teaspoons
    • Eggs 3
    • Butter unsalted 85g

        For the syrup:

    • Caster sugar 170g
    • Water 210g
    • Rum or other spirit (optional) 5 tablespoons

        For topping (all optional):

    • Glacé cherries, half a dozen
    • Desiccated coconut, small handful
    • Fresh fruit
    • Cream

    Utensils

    • Large mixing bowl
    • Sieve
    • Wooden spoon for beating
    • 21cm diameter cake tin (needs to be quite deep, mine's 7cm deep)
    • Baking parchment for lining the tin
    • Oven

    Method

    Lightly adapted from Elizabeth David's English Bread and Yeast Cookery
    1. Warm the milk to body heat, either in the microwave or on the stove
    2. Sieve the flour into your large bowl
    3. Add the yeast, salt and sugar to the bowl
    4. Rub in the butter, doesn't have to be super fine just enough to break it up into 1cm sized chunks
    5. Stir in the warm milk
    6. Add the eggs
    7. Mix together with a wooden spoon, it doesn't matter if it's still a bit lumpy at this stage
    8. Cover and leave in a warm place (around 25 degrees Celsius) for around an hour until doubled in volume
    9. Beat the mixture with a wooden spoon for around five minutes, it should thicken slightly
    10. Line your tin with baking parchment
    11. Pour the mixture into the tin, it should be less than half full to allow room for expansion
    12. Put your oven on to preheat at 180 degrees Celsius
    13. Cover the tin lightly and place it in the same warm place as before
    14. When the mixture is 1cm away from the top of the tin it is ready to bake (45min - 1hour)
    15. Place on a baking tray in the hot oven for 25 minutes
    16. Whilst the cake is baking boil the sugar and water together for 10-15 minutes until it thickens slightly
    17. Remove the syrup from the heat and add the alcohol (optional)
    18. When the cake is baked it should have a pale golden colour all over, you can test the centre is cooked by inserting a skewer in the middle and seeing if it comes out clean
    19. Leave it to cool for 2-3 minutes
    20. Turn the cake upside-down onto a large dish or plate
    21. Pour most of the syrup over the top of the cake and leave for 10-20 minutes to absorb, retain a little syrup and serve alongside as a sauce
    22. Add your desired toppings and serve

    Sunday, 28 March 2021

    Double-fermented pumpernickel


    This recipe is inspired by one from Tartine Book No. 3 just adapted to suit my sourdough method and with less fermented rye than the original.

    Ingredients

    (Yields two large loaves)
       Ingredient   Weight (g)  Baker's percentage
    Levain build
     50% hydration white flour starter 150
       Strong white flour  300
       Cold tap water  300
    Fermented rye-chops
     Rye chops 100
       Cold tap water  200
       Sourdough starter  Dessert spoon
    Final dough  Strong white flour   400  
       Wholemeal spelt flour  300  
       Tap water 30°C  365  
       Salt  15  
       Black-strap molasses  50  
       Levain  750  
     Overall formula  Strong white bread flour  800  73%
       Wholemeal spelt flour  300  27%
       Water  715  65%
       Salt  16  1.5%
       Fermented rye chops  200  18%
       Black-strap molasses  50  5%

    Method

    This recipe follows my standard sourdough method with a couple of additions - refer to that for more detailed instructions - brief method below:
    1. Add all the ingredients for the levain build to a large bowl and stir until mixed together thoroughly
    2. Add the ingredients for the fermented rye chops to another smaller bowl and mix thoroughly
    3. Cover both bowls and leave overnight at room temperature until the surface of the levain mixture is covered in small bubbles.  The rye chops should have absorbed most of the water and smell sweet.
    4. Add all of the remaining ingredients except the fermented rye to the large bowl and bring together
    5. Knead the dough until it has moderate strength
    6. Strain any excess water from the rye chops with a sieve
    7. Lay the dough out on the work-surface and cover with the rye mixture
    8. Fold the rye into the main dough, and work it until the dough comes back together. In the interim it will be messy and sticky, persevere.
    9. Form the dough into a ball, cover and leave at 25 degrees Celsius to prove till doubled in size (around 2.5 hours), folding after 50 minutes and 100 minutes.
    10. Shape the dough into two large loaves and place into floured bannetons or a couche
    11. Leave to prove again for around two hours at 25 degrees Celsius, meanwhile set the oven  (filled with two baking stones if you have them) to preheat to 250 degrees Celsius
    12. When the loaves are a bit less than doubled in size, slash them and load them into a steamed oven, lowering the temperature to 220 degres Celsius as you do so
    13. Bake for 10 minutes with steam
    14. Bake in a dry oven for another 15-20 minutes till the loaves are nicely browned (they will take on a lot of colour due to the molasses) and they sound hollow when tapped on the bottom
    15. Remove the loaves and leave to cool on a wire rack


    Wednesday, 17 February 2021

    Chelsea Buns


    Ingredients

    For the dough:

    • 250g milk (or mylk substitute of your choice)
    • 7g instant yeast
    • 500g strong white bread flour (plain will do)
    • 60g butter (salted or unsalted or margarine)
    • 40g caster sugar (can substitute other sugars)
    • 10g salt
    • 2 large eggs (or around 60g of vegetable oil)
    • Zest of one lemon
    • 1 teaspoon of mixed spice

    For the filling:

    • 30g butter, slightly softened (or margarine)
    • 35g soft brown sugar
    • 200g dried fruit (currants, sultanas, mixed peel, etc.)

    For the glaze:

    • 2 tablespoons caster sugar
    • 1 tablespoon milk (or mylk)
    • 2 tablespoons demerara sugar

    Optional Extras:

    • Sugar for icing
    • Your favourite tipple for soaking the fruit

    Utensils

    • Oven
    • Large mixing bowl
    • Rolling pin (optional)
    • Baking tray (around 27cm by 27cm or equivalent)
    • Dental floss, for cutting the rolls (optional)


    Method

    This recipe is based upon Felicity Cloake's how to make the perfect chelsea buns, combined with Richard Bertinet's pain Viennois dough, with a few tweaks such as more fruit for the filling. 

    1. Heat the milk to just below boiling, then set aside to cool
    2. Add all of the other dough ingredients into a large mixing bowl
    3. Rub in the butter
    4. Once the milk has cooled to body-heat add it to the dough
    5. Mix in the milk until you have a sticky dough
    6. Turn out the dough onto an un-floured work surface
    7. Knead the dough until it is smooth and elastic
    8. Cover and put in a warm place (25 degrees Celsius)
    9. Leave for around an hour until doubled in size
    10. Roll out the dough into a 25x35cm rectangle, with the longest edge facing you
    11. Spread the butter across the surface
    12. Scatter the sugar and fruit across the buttered dough
    13. Tightly roll the dough away from you and seal the seam underneath
    14. Grease your baking tin, or line with baking parchment
    15. Slice your dough into even sized buns using either a sharp knife or your dental floss
    16. If using a 27x27cm tray you should aim for nine buns
    17. Place the buns in the tray cut side up
    18. The buns should be around 1cm apart to allow for expansion
    19. Put your oven on to preheat to 180 degrees Celsius
    20. Cover your buns and put in a warm place (25 degrees Celsius) to prove for up to an hour
    21. When ready to bake the buns should have expanded such that they are touching
    22. Bake for 20-25 minutes
    23. If the buns are over-browning or the exposed fruit is catching you may need to loosely cover them with tin foil
    24. Just before the buns are baked, warm the milk and caster sugar in a pan to make a thin glaze
    25. As soon as the buns are out of the oven, brush with the glaze
    26. Scatter the buns with the demerara sugar
    27. Allow to cool slightly before serving

    Monday, 16 November 2020

    Lussekatter

    For more on the history of these buns see here.

    Ingredients

    Makes 16 pieces

    Ingredient  Weight (g)
    Strong white bread flour (plain or gluten-free will do) 500
    Milk / mylk  250
    Butter / margarine  60
    Caster sugar  40
    Instant yeast  7
    Salt  10
    Saffron  0.5g (or 1 teaspoon)
    Cardamon (optional)  1 teaspoon (or 6 pods)
    Raisins / currants  A handful (or 32 to be precise)
    Eggs
     2 large (or 60g of vegetable oil) plus extra for glazing

    Method

    • Melt the butter in a small saucepan add the milk and bring to just below boiling
    • Take off the heat and add the saffron, you can grind it if you like to give a more intense flavour and colour
    • Add the flour, sugar, yeast, salt, eggs and optional cardamon to a large mixing bowl
    • Once the milk mixture has cooled to body heat, add it to the mixing bowl
    • Bring together then knead until smooth and elastic
    • Cover the bowl and leave it in a warm place (25 degrees Celsius) for around an hour till doubled in size
    • Optionally soak a handful of raisins in some spirit
    • Put the oven on to preheat to 180 degrees Celsius
    • Line two baking trays with parchment (or simply grease them)
    • Divide the dough into 60g pieces
    • Roll into sausages about 30cm long
    • Coil into S-shapes and place on baking tray
    • Push raisins deeply into the dough
    • Leave to rise for around ten minutes till slightly puffy
    • Brush with egg
    • Bake for 12-15 minutes till golden
    • Leave to cool on a wire rack under a tea-towel to stop them drying out

    Tuesday, 27 October 2020

    Sourdough Recipe for a Single Loaf

    Ingredients

       Ingredient   Weight (g)  Baker's percentage
    Levain build
     100% hydration starter 100
       Strong white flour  150
       Cold tap water  150
    Final dough  Strong white flour   350  
       Tap water 30°C  150  
       Salt  10  
       Levain  400  
     Overall formula  Strong white bread flour  550  100%
       Water  350  64%
       Salt  10  2%


    This is a version of my standard sourdough recipe, but scaled to only make a single large loaf. The method is the same, only the quantities are different, with a slight adjustment to the amount of starter included to reflect how I normally make it these days.

    Levain build

    The night before you plan to bake, mix 100g of starter with 150g bread flour and 150g cold tap water in a large bowl. Cover and leave at room temperature for 10-12 hours.

    Flour, water and starter

    Mix all the ingredients together

    Cover and leave for 10-12 hours

    Mixing the main dough

    The following day your mixture should be nice and bubbly, if not then there's no point in proceeding as your bread won't rise.  Maybe it's too cold or your starter just isn't very active, put it somewhere warmer (up to 25 degrees Celsius) and leave it for longer till it does get bubbly.
    Once it is all bubbly add 350g of strong bread flour, 150g of water at around 30 degrees Celsius and 10g of salt. Mix it all together until there are no dry bits then turn it out onto your un-floured work surface and knead until smooth and elastic. Form into a ball and return to your lightly floured bowl. Cover the bowl and place it in a warm place (around 25 degrees Celsius) until doubled in size. This doubling could take anywhere between 2.5 and 4 hours. Whilst it's rising give the dough two letter folds, one every 50 minutes or so.

    Add flour water and salt to the levain
    After kneading, form into a ball and return to the lightly floured bowl

    Cover and leave to prove in a warm place for 2.5 to 4 hours until doubled in volume.
    Letter-fold twice during this time

    Form into a ball and put down to prove (upside-down) in a well-floured bowl.
    Leave covered in a warm place for another 2.5 to 4 hours

    About an hour before your dough is finished proving pre-heat your oven to 250 degrees Celsius

    Wait till slightly less than doubled

    Turn out onto a floured baking tray.
    Slice a pattern in the top using a sharp knife

    Bake at 250 degrees Celsius, with steam for ten minutes.
    Reduce to 220 degrees and bake for another 10-25 minutes.
    When done the base should sound hollow when tapped.
    Cool on a wire rack.


    Friday, 19 June 2020

    Sourdough foibles

    60% hydration

    60% hydration crumb

    For a while I've had a standard sourdough recipe that's been pretty reliable that I can bake with a flexible schedule without having to think about it too much.  With the flour availability issues of late, and having more time to bake, I bought a sixteen kilogram bag of Finest Bakers White No.1 Flour from the renown Shipton Mill.  I thought I'd try out the flour with my trusted recipe which has a hydration of about 65%, so nothing too crazy.  The results were disappointing, the dough turning out much slacker, more extensible with less strength, and hence harder to shape, and the final loaf was a bit flat.  The dough also seemed to ferment much faster than usual but temperatures were unusually high (the ambient temperature was around 20 degrees Celsius during the levain build).

    65% hydration, boule on the right is a bit flat

    It felt like the dough was generally a bit too wet, which I found surprising, but I thought I'd try reducing the hydration as low as 60% to see what happened. The results were interesting and I was much happier with them than the original recipe.  Here's the amended recipe:


    Ingredients

    Makes two large loaves.
    10% pre-fermented flour
      Ingredient  Weight (g) Baker's percentage
    Levain build
     100% hydration rye starter 200 66%
      Strong white flour 300 100%
      Cold tap water 300 100%
    Final dough Strong white flour  700 
      Tap water 30°C 250 
      Salt 17 
      Levain 800 
     Overall formula Strong white bread flour 1000 90%
      Whole rye flour (from starter) 100  10%
      Water 650 60%
      Salt 17 1.5%

    Method

    • To build the levain, in a large bowl, mix together the starter, flour and water until evenly incorporated
    • Cover the bowl and leave to rest for around eight and a half hours at about 22°C
    • Add the fresh flour, water and salt to the levain build and mix together till there are no pockets of dry flour
    • Knead until the dough is smooth and elastic
    • Form into a ball, return the dough to its lightly-floured bowl and cover
    • Leave to prove for 45 minutes at 25°C
    • Letter-fold the dough, return it to the bowl and cover it
    • Leave to prove for another 45 minutes at 25°C
    • Turn the dough out onto a lightly-floured work-surface and divide it in two
    • Pre-shape the two portions of dough into balls and leave to rest on the bench (covered) for around 15 minutes
    • Shape the loaves as batards using the cinching method
    • Leave them to prove in oval bannetons for an hour and a half at 23°C
    • Cut them with a razor blade, on a slight curve to one side of the loaf, and bake them on a stone in a fan-oven pre-heated to 250°C with some boiling water on tray at the bottom of the oven
    • After loading the loaves into the oven, lower the temperature to 220°C to prevent scorching
    • After 10 minutes remove the water-tray and rotate the loaves in the oven to given an even colour
    • Bake them for a further 15 minutes, remove them from the oven and leave them to cool on a wire rack

    Things to note

    I've never had this sourdough recipe prove so rapidly, I think it must be a combination of the flour the warm weather and my starter that made it behave that way.  Also I was surprised that such dry dough yielded good results, but don't expect the same to hold true for you as every flour is different. The biggest lesson for me was that you can't just follow the timings or even ratios for a known recipe, something as simple as changing flour brand can make a big difference. I wouldn't have ended up at this point without methodically working through a couple of failed attempts at higher hydrations.

    N.B. if you want more detail on the techniques involved in the method, they're more fully described in the original standard sourdough recipe

    Sunday, 7 June 2020

    Yeasted white dough

    Batard and boule

    Crumb

    Ingredients

    Makes two large loaves:
    • 1000g strong white bread flour
    • 700g water 30 degrees Celsius
    • 20g salt
    • 4g dried active yeast

    Method

    • Add all the ingredients into a large bowl and mix together until they are incorporated
    • Knead the dough until it becomes smooth and elastic
    • Shape it into a ball and place it back into the bowl (lightly floured)
    • Leave to prove for 5 hours at around 25 degrees Celsius
    • Letter-fold the dough every 45 minutes for the first 2'15" (see here for description of folding)
    • Gently turn the dough out onto a lightly-floured work surface
    • Divide it in two and lightly shape into balls
    • Leave covered for a few minutes for it to relax whilst you flour your couche or bread basket
    • Shape into boules or batards and place into your floured baskets / couche
    • Preheat your oven, containing your Dutch-ovens, to 250 degrees Celsius
    • Be super careful - it's very easy to give yourself a nasty burn. Clear plenty of space, place oven mitts on top of hot items to remind yourself and don't get distracted
    • Leave your loaves to prove for between one hour and one hour fifteen minutes at 25 degrees Celsius
    • Turn your loaves out onto a floured surface and cut a pattern in the top with a sharp knife
    • Gently transfer your proven loaves to your Dutch-ovens and bake for 30 minutes covered, and another 5-10 minutes uncovered to brown them off
    • Leave to cool


    Monday, 25 May 2020

    Rum-soaked prune and cardamon bread

    Finished article
    Crumb

    After the first prove
    Dividing
    Shaping

    This recipe is a combination of the one from Richard Bertinet's book Dough and the method from Ken Forkish's Flour Water Salt Yeast.

    Makes 2 large loaves.

    Ingredients
    • 400g strong wholewheat flour
    • 600g strong white bread flour
    • 800g water at around 30 degrees Celsius
    • 20g salt
    • 4g instant dried yeast
    • 200g rum-soaked prunes
    • 1/2 teaspoon of fresh-ground cardamon
    Method
    • Soak the prunes overnight in a dark rum.
    • Put the prunes and cardamon to one side, and mix the remaining ingredients together till roughly combined (around 3 minutes on the slowest speed if using a mixer).
    • Increase the speed on your mixer to the second slowest setting and mix for another 6 minutes.  The dough will still be quite wet and loose, but will have some discernible strength.
    • Add the cardamon and prunes, but don't take too much liquid across with the fruit, and mix on the slowest speed until just distributed throughout the dough.
    • Form the dough into a ball and place in a lightly-floured, covered bowl to prove.
    • Prove for five hours at 25 degrees Celsius, giving it four folds, one every 45 minutes, to improve the dough strength.
    • Divide and shape the dough into two balls.
    • Place in well-floured proving baskets, cover and refrigerate overnight.
    • In the morning preheat a Dutch-oven to 250 degrees Celsius for a good hour.
    • TAKING GREAT CARE NOT TO BURN YOURSELF bake the loaves sequentially straight from the fridge, cutting your desired pattern in the top.
    • Bake covered for 30 minutes, take the lid off and bake for around another 10 minutes to colour the loaf.
    • Leave on a wire rack to cool.

    Tuesday, 25 February 2020

    Sesame and sunflower seed loaf recipe

    Makes one large loaf

    Ingredients
    • 500g strong white bread flour
    • 300g water (at approximately 30 degrees celsius)
    • 50g sunflower oil
    • 10g salt
    • 7g dried instant yeast
    • 50g sunflower seeds
    • 50g sesame seeds
    • 1.5 teaspoons honey
    • 1 teaspoon of sesame oil


    Weigh the ingredients and mix them altogether - being careful not to put the yeast in direct contact with salt as it will kill it.
    You should end up with a loose, sticky dough.
    Turn it out onto your clean work-surface DON'T ADD ANY FLOUR.
    You'll find this dough hard to knead using a normal technique so you might want to try something like this:
    http://youtu.be/PvdtUR-XTG0

    If that looks too tricky you can use a more conventional kneading technique such as:

    It's the high water content that gives you a light fluffy loaf - which is why it's important not to be tempted to add any flour to make it less sticky.
    As you work the dough though it will naturally get smoother and less sticky until it no longer sticks to the work-surface, this should take less than 10 minutes (and is quite good exercise).
    Cover your work surface with a very light dusting of flour and shape your dough into a ball.
    Place it in a lightly-floured bowl, cover it and leave it for one hour at about 25-30 degrees celsius).

    After about an hour your dough should have roughly doubled in volume.
    Take it out of its bowl and shape it, see here https://www.thekitchn.com/basic-techniques-how-to-shape-97063
    Cover it so it doesn't dry-out and leave it for another hour at 25-30 degrees celsius to double in size again.

    In the meantime get your oven good and hot (250 degrees celsius) if you have a baking stone put that in the oven to get warm, if not then a thick baking tray will do.

    Slice a nice simple pattern on the top using a sharp knife.
    Place your loaf in the oven.
    If you have a clean spray gun (as you use for watering plants) you can spray some water in the oven (the steam helps it rise), or simply put half a cup of hot water in a tray in the bottom of the oven.

    Shut the oven door and don't be tempted to keep opening it.
    After five minutes turn the heat down to 220 degrees celsius.
    Leave it to bake for another 25 minutes (making a total of 30).
    You can tell the loaf is done if when you take it from the oven and remove it from the tin, the bottom sounds hollow when you tap it.
    If not then put it back in for another five minutes – you may want to take it out of the tin for the last five minutes so that the sides of the loaf crisp up a little.

    Friday, 27 July 2012

    Decimation * 9

    So it turns out the squirrels have developed a rather effective tactic of sitting on the wheat to flatten it, then nibbling off the ears. Combined with some effective backup from the portly pigeons means what there was of my crop has largely disappeared.

    I have a feeling it's time to admit defeat, though I will be more conservative with my bench-flour in future.


    What's left of the harvest.


    Thursday, 12 July 2012

    All ears

    Various threats are still present from fungi to pigeons but I'm still hopeful there will be something of a crop.

    Wednesday, 13 June 2012

    Thursday, 31 May 2012

    Wheat from chaff

    So some of the plants are still quite stunted and a bit yellow but the healthier ones are starting to sprout ears; you never know we may get some flour yet....


    Saturday, 26 May 2012

    Not wheat but bread

    No real news on the wheat front, it's a bit yellow but it is still growing.
    So I thought I'd provide a recipe instead.

    Here's my standard white sourdough, an amalgamation of things from:

    This recipe assumes you have a 100% hydration starter for which you'll either need to grow your own or befriend a baker that has one ;-)  It will make two large loaves which should just about fit in most domestic ovens.

    Take 100g of your starter and add to it 300g of strong white flour and 300g of cold tap water.
    After leaving it overnight, covered and at room temperature, it should be full of lots of little bubbles like the above.

    Add to your bubbly leaven a further 700g of strong white flour,  350g of warm water (around 30 degrees Celsius) and 15g of salt.  Mix it all together with a scraper or a wooden spoon.

    What you should have now is a shaggy mess of a dough (see above).   If you're kneading by hand I use the French technique as popularised by Richard Bertinet (Google is your friend) but if you're using a mixer then five or six minutes at a low speed should do it. 

    Hopefully what you have after kneading is a smooth elastic dough that has lost the shaggy-stickiness it had to start with.
    Form it into a ball and place it in a lightly floured large bowl.  Leave it for around an hour at room temperature.

    You should notice that it has risen some when you come back to it.  What you do now is give it a series of folds,  these are  a bit like a very gentle knead that's intended to ensure your bread ends up nice and light.  So empty your dough onto a lightly-floured work-surface and gently spread it out.

    Now take the top edge of the dough and fold it two-thirds of the way down  giving it a good stretch as you do so.
    press down the bottom edge to stick it in place.

    Turn the dough around and do the same fold with the other edge.

    Rotate the dough and again fold the top edge two-thirds of the way down the body of  the dough.
    Turn the dough round and to the same with the other edge so you have a square-ish parcel.
    Turn your parcel upside-down and place it in a lightly floured bowl.
    Leave it covered for another hour at room temperature.

    Once the hour is up repeat the above folding procedure and return it to the bowl.
    After the final hour of rising (making three in total) your dough should have doubled in size.


    Since this recipe makes two loaves tip the dough onto a lightly-floured work-surface and divide it in two.

    Shape each half into a loose ball.


    Take a bowl that's large enough to accommodate twice the volume  your dough and  line it with  a clean tea-towel.
    Flour it well and after giving your ball of dough a final shaping to make it into a nice tight ball place it smooth-side down into the bowl.  Cover it and leave it for anywhere between two and four hours at room temperature.  You're looking for the dough to have roughly doubled in size, the exact timing depends a lot on the temperature and how active your starter is.  At least an hour before your dough is finished proving turn your oven on to 250 degrees Celsius to get it good and hot.  If you have a baking stone then don't forget to put that in the oven to warm up along with it but if you don't have one a sturdy oven tray should go in instead.

    Lightly flour some baking sheets and gently turn out your proven dough onto them.  Slash the surface with a simple pattern to help the loaf expand in the oven and make it look pretty (use a very sharp blade to do this, though a bread-knife does fine too).
    Making sure your oven is up to temperature shoot the loaves off of your baking trays onto the hot stones or trays in the oven.  Mist the inside of the oven with some water from a spray gun or by pouring half a cup of water into a dish in the bottom of the oven.  This steam will help the bread to achieve a good oven-spring.
    After five minutes turn the oven temperature down to 220 degrees Celsius.
    Leave the loaves for a further 25 minutes to finish cooking.
    After this time take them out of the oven and tap their bottoms - if they sound hollow they're done if not return them to the oven for a further five minutes.
    Once baked remove them from the oven and place on a wire rack to cool completely.
    Only bad bread gets eaten warm ;-)


    Hopefully all of that made some sense and you now have more bread than you know what to do with :-D